The following workflow will be used by all students in the School of Journalism and Media and should be altered only with the express permission of your instructor. Proper workflow and organization and the effort made upfront will save you hours of work later and could also save your project from crashes, failed drives, or other catastrophes.
Memory: Your SD/memory card should be formatted each time you put it in the camera to begin a new shoot. NEVER use your SD/memory card for long-term storage.
Before you copy any files from your shoot, first create a project folder that will contain all of your assets.
For a simple still photography shoot, one folder with a naming structure outlined below is sufficient (example: 230214ValentinesDay). Your photos can be dragged/copied into your project folder from your SD card.
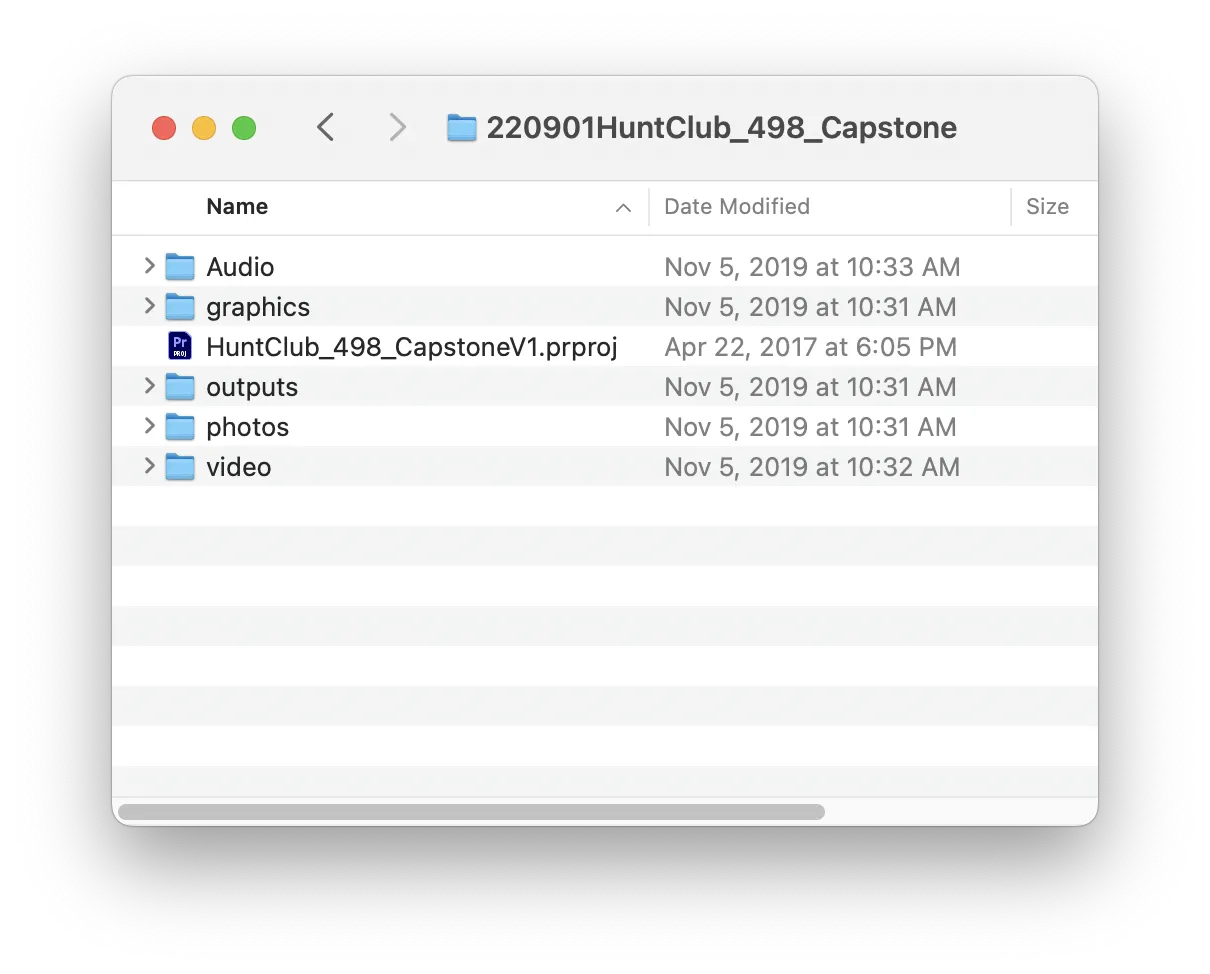
For a video shoot, create your project folder with a set of subfolders that resemble these in the image here. This project folder should be on an external hard drive. NEVER edit from an SD card or a USB thumb drive. The read/write speed is too slow for editing and those devices are not designed for long-term storage. It is a matter of WHEN, not IF, you will regret it. You will name your project folder using a date string like "YYMMDD Story Slug". Inside your project folder will be the new folders named VIDEO, PHOTOS, OUTPUTS, AUDIO, and other relevant folders such as GRAPHICS, NOTES, etc. This is how you will organize the assets of your video.
When finished shooting for the day, copy your files from your memory cards into the appropriately labeled folders you created in your project folder.

Your folder should be organized in a way to help you find your files even if you haven’t looked at them in weeks, months, or years.

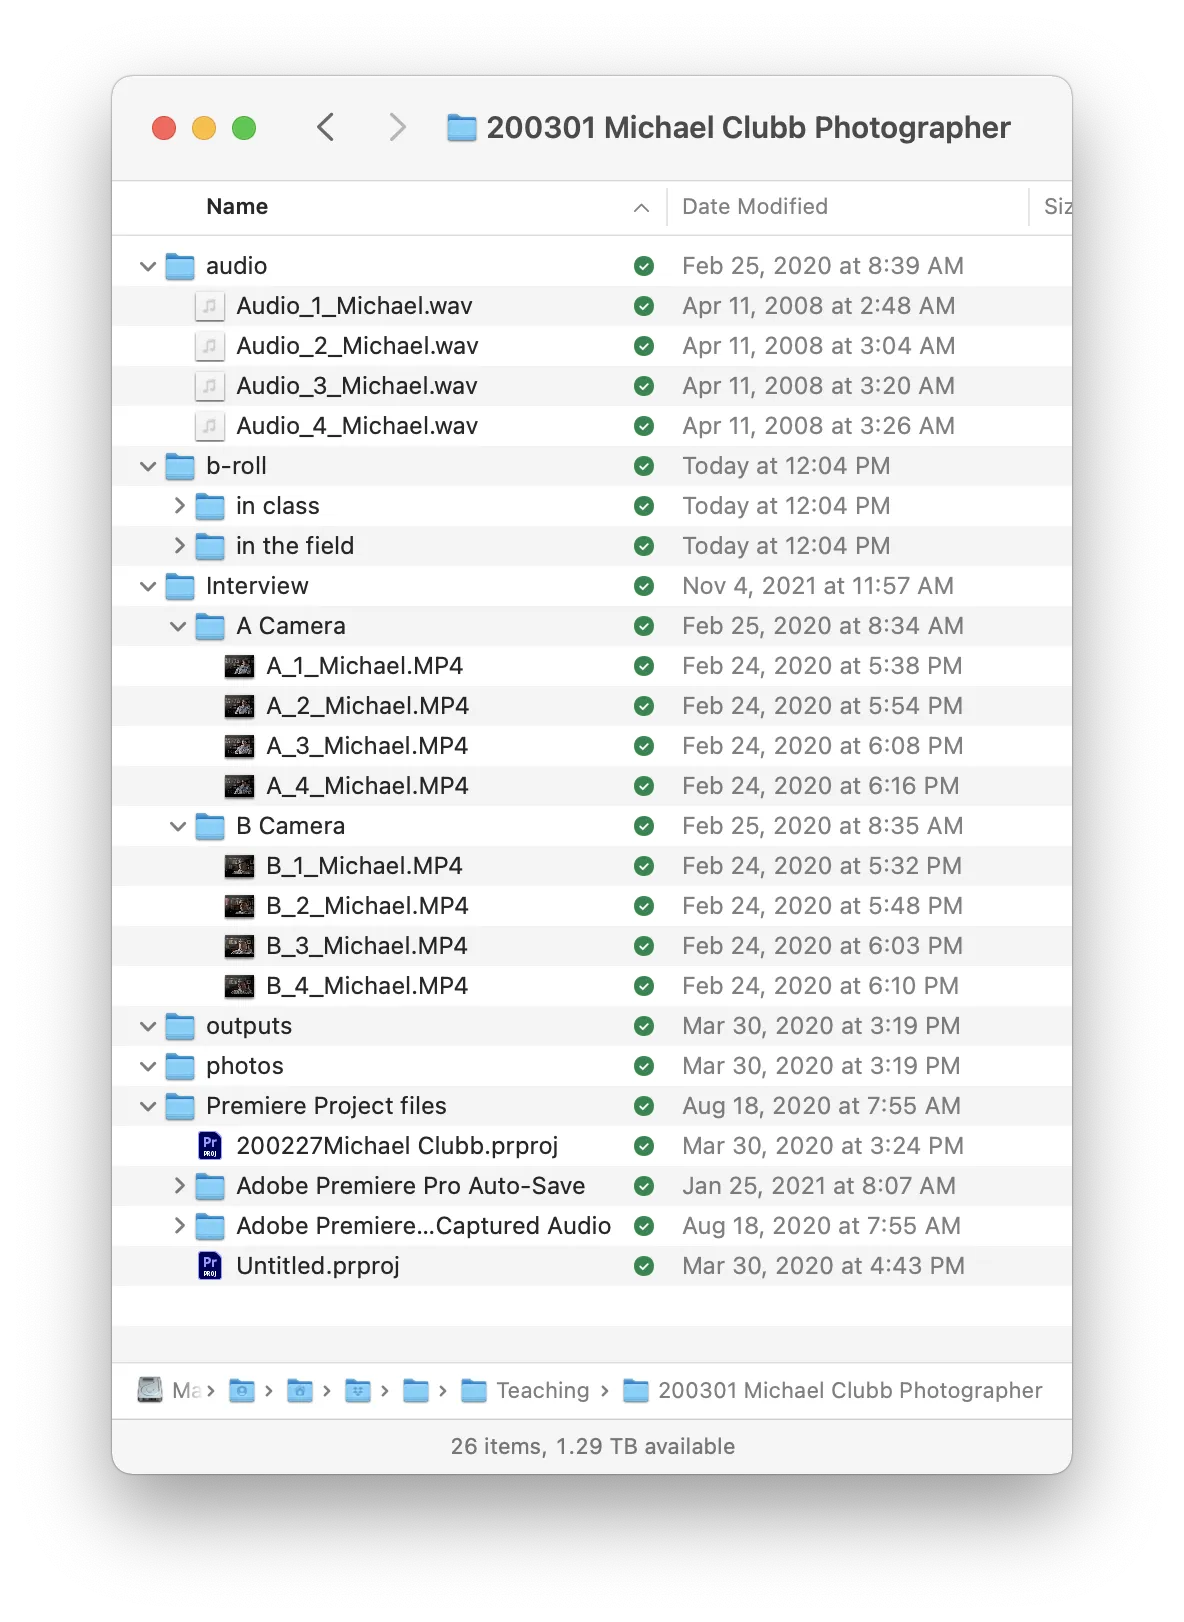
After you have placed copies of your files in these folders (see image 2), THEN you can import them into Premiere Pro. Never drag a file or import a file to Premiere Pro directly from your SD card or desktop. ALWAYS place them in your project folder first, then import them into Premiere Pro. This is true for every file you use in your project. By placing the file in this folder before importing it into Premiere Pro, you won’t lose the link to the reference file.
Exported files, even drafts or partial edits, should be exported into the outputs folder (or you can name it exports, whatever, you get the point).
Next, place a copy of your project folder in OneDrive or another cloud-based storage system. The copy in the cloud will be your backup. Each night after editing, you should update your project folder in the cloud by either uploading the entire folder again or only uploading the new or changed content.